UNBOX.INSTALL.USE
Acoustics Panel Installation Guide
ACOUSTICS PANEL INSTALLATION GUIDE
This guide is presented in good faith to assist in the installation of Numobel Precision Cut Panels. It is not intended as an all-encompassing guide, and a professional qualified installer is recommended for optimum results.
Numobel accepts no responsibility for installation actions taken or not taken. Please refer to Numobel Terms of Trade.
This installation guide contains only recommendations; if you have any questions about installation techniques please contact your distributor or Numobel sales representative.
PLEASE NOTE:
-
Allow for thickness variations due to manufacturing tolerances and any minimal unevenness of substrate.
-
Exact colour matching cannot be guaranteed between batches.
-
Fibre mix and surface texture may vary.
-
Please check that all panels are the correct design, colour, shape and batch number (if requested).
-
Numobel Panel has an inherent grain direction. Stickers with the Numobel logo are placed in the same corner of each plain panel to assist with correct panel orientation.
-
No claims will be accepted after panels are installed.
-
Ensure appropriate work safety regulations are met, e.g. protective clothing, eyewear and respiratory equipment.
HANDLING & STORAGE
Carry boxes and panels upright Store in a cool dry place, with no direct sun. Avoid 65°C or greater
Store boxes and panels flat Keep all surfaces clean for storage and fabrication
Wear gloves for handling light colours Upon delivery, inspect all goods for order correctness and damage
Keep dry and avoid humidity Protect the edges
INSTALLATION
This guide is for a direct fix method with butt joining side by side.
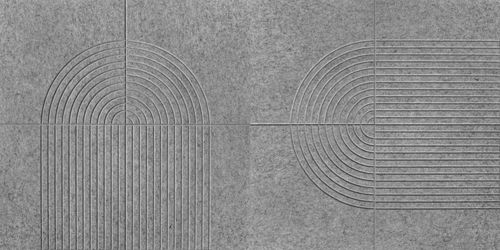
Numobel Panel is a non-woven product that can vary by up to 7% in thickness which is a natural characteristic of this material. Vee Groove cuts can therefore vary in depth from panel to panel.
CUTTING/TRIMMING BY MACHINE
-
Numobel Panel can be cut on a CNC machine or using a plunge cut circular saw or bandsaw with wave toothing blade and a metal guide.
-
Do not use a serrated blade with side-set teeth.
-
Trial cut on a scrap piece first, as saws will behave differently on sheets of different thickness and density.
-
Feed against the rotation of the blade or tool using a slow, consistent feed rate to prevent overheating.
-
A fast feed can cause frictional heat which can melt or fuse the heated contact points with a saw blade.
-
Secure sheet whilst cutting to minimise vibration.
Some grooves may be wider or narrower than others. It is recommended, for continuous application of panels side by side on a wall, these grooves must be assessed by a qualified installer and grouped by groove size and depth for accurate pattern matching.
CUTTING/TRIMMING BY HAND
-
Ensure blade is inserted into panel at 90° to the surface to ensure square edges and best results for butt joins.
-
Ensure the blade is sharp and not too long or flexible to avoid skew cuts.
-
Replace the blade often to maintain sharpness.
-
For best results, use multiple cuts and light pressure.
-
Keep flat and use a backing mat.
-
Use a secure straight edge for straight cuts.
FIXING & ADHESIVES
-
Numobel Panel can becan be direct fixed with a commercial adhesive. It is the installer’s responsibility to ensure the adhesive used is appropriate for the product and substrate it is being fixed to.
-
Prepare the site with a clean drop sheet and place the panels face side down on the floor.
-
Ensure the wall or ceiling surface is clean and free of dust or imperfections that could prevent adhesion. Industry standard of drywall Level 3 is recommended.
-
Panels may easily flex. To avoid creasing, ensure they are well supported by a minimum of two people when positioning vertically to the substrate.
Although there is no set formula for fixing spans, it is reasonable to expect that fixing between 450mm to 600mm centres both vertically and horizontally would cause the panel to remain rigid in most circumstances.
-
Adhesives should be used as per the manufacturer’s instructions, and it is advised to perform a test piece prior to full installation.
-
When using adhesives, position the panel to the substrate and apply even gentle pressure. Ensure to use minimum pressure at the edges to avoid adhesives showing.